 Hello all, it's been quite yukky here in in the clouds today, snow on the hills, low mist, and wet, wet, wet...So I thought I'd bring you a taste of summer in the shape of my latest felt picture.
  It started life as a very rough pencil sketch from a little magazine picture. I add a few splodges of colour and scribble a few notes down in the margins.
Next I make my base fabric by wet felting Merino wool. This is always a bit hit and miss as you only have a certain amount of control over the felting process. You can never be totally sure where your fibres will have moved to during all that rubbing and rolling!
 As I'm quite a control freak I think it does me good not to have complete control. It makes me have to find ways to work with what I have rather than what I would have liked, which in turn stretches me and makes the whole piece more organic, it has to grow rather than be designed and just made. Once the felt is dry...
 the good bit starts...the embroidery! I always have a little panic at the start though, it's that blank piece of paper syndrome; where shall I start, what colour and type of thread shall I use! You wouldn't believe how long I put this bit off sometimes!
 Once I have a few patches of embroidery started and I've 'tasted' a few colours, I'm ok.
 All these tiny little flowers are made from pure silk which I hand dye myself and then shape and individually stitch into place.
 I try not to use too many different embroidery stitches as I don't want the piece to be an 'embroidery' as such. I just need the stitches to add texture and accentuate the shapes and colours already in the felt.
 I absolutely love the dry stone wall in this piece, and the little clump of trees in the background, I think they worked really well. I've never done anything 'hard' like the wall before, I've only ever done soft vegetation and flowers so every time I see it I want to dance a little jig while my heart does a little squishy thing in my chest.
 So.....
 Till next time
As I'm quite a control freak I think it does me good not to have complete control. It makes me have to find ways to work with what I have rather than what I would have liked, which in turn stretches me and makes the whole piece more organic, it has to grow rather than be designed and just made. Once the felt is dry...the good bit starts...the embroidery! I always have a little panic at the start though, it's that blank piece of paper syndrome; where shall I start, what colour and type of thread shall I use! You wouldn't believe how long I put this bit off sometimes! Once I have a few patches of embroidery started and I've 'tasted' a few colours, I'm ok.
 All these tiny little flowers are made from pure silk which I hand dye myself and then shape and individually stitch into place.
 I try not to use too many different embroidery stitches as I don't want the piece to be an 'embroidery' as such. I just need the stitches to add texture and accentuate the shapes and colours already in the felt.
 I absolutely love the dry stone wall in this piece, and the little clump of trees in the background, I think they worked really well. I've never done anything 'hard' like the wall before, I've only ever done soft vegetation and flowers so every time I see it I want to dance a little jig while my heart does a little squishy thing in my chest.
 So.....
Here it is, complete and in all it's glory!
A true Ta daa! moment.
A true Ta daa! moment.
 Till next time
love fi x


 And do you remember this higgledy-piggledy chunk of patchwork hexagons that I found inside that unassuming cardboard box? See... I told you it was a treasure box.
 You may even remember that I unpicked and restitched the hexagons adding a border made from fabric I'd also found in a charity shop and a backing made from my Mums old sheet that I dyed pink.
 Well I have to say if you can remember all that you must have a memory like an elephant! I've just had to check back and I originally showed you 'Granny Pilleys' embroidery box way back in


 As promised here is
  Hello all, here we are at the start of a new year and I don't know about you but I'm really quite excited. The Christmas decorations have been packed away, hooray and the last of the festive food has been finished (apart from the obligatory handful of left over toffees). #1 has returned to uni and #2 is back at school. Visiting relatives have been hugged, kissed and waved goodbye, all that's left to do now is a bit of 'start-as-you-mean-to-go-on' tidying and sorting. Starting with my fabric stash, well part of it. My lovely mum helped me sort and refold the bottom 3 shelves of my fabric cupboard; so previously I was forcing fabric in willy-nilly now it looks like there could even be room for some more! ;)
  My first bit of stitching of 2012 was a little experiment joining patchwork hexagons by machine. A little bit fiddly but certainly quicker than by hand. I think I'd need another practice session before I made anything larger.


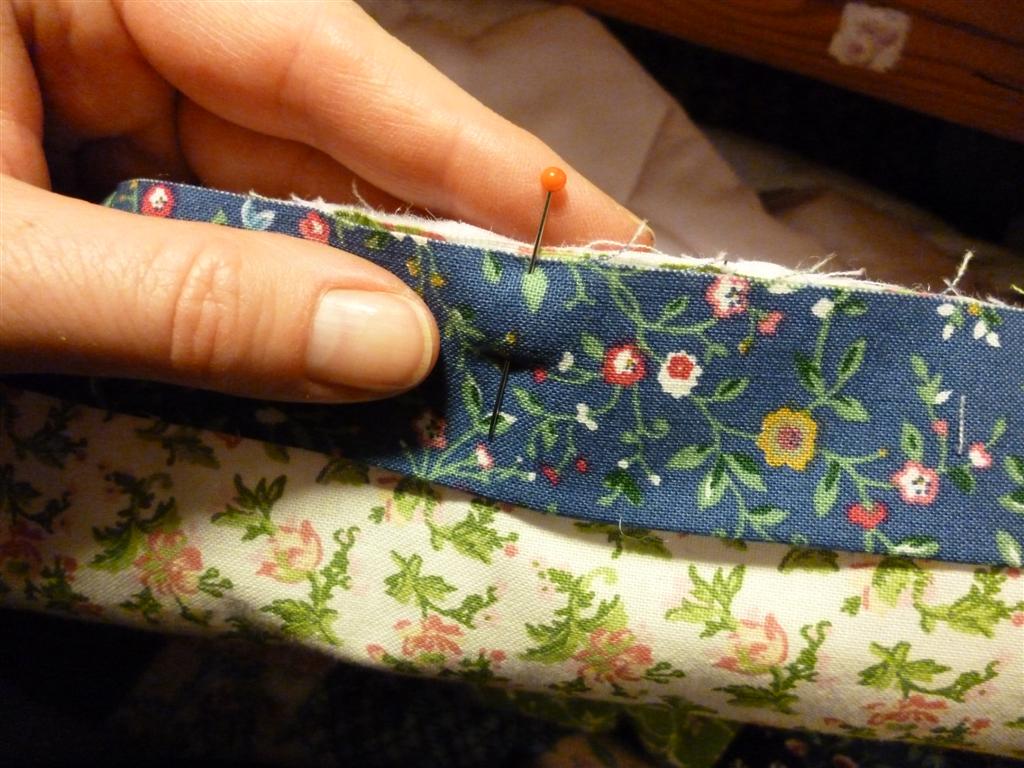
 Now because we've stitched very neatly in the 'ditches', the back should look like this...almost as good as the front...


