Showing posts with label patchwork. Show all posts

Wednesday, 20 February 2013

It started with a .....


CUSHION
No that's wrong...
It actually started with lots of little squares.
 and many itty bitty seams.
 Which magically became 2 cushions, as is often the case.
Closely followed by OOing and AAHing and the request for a quilt.
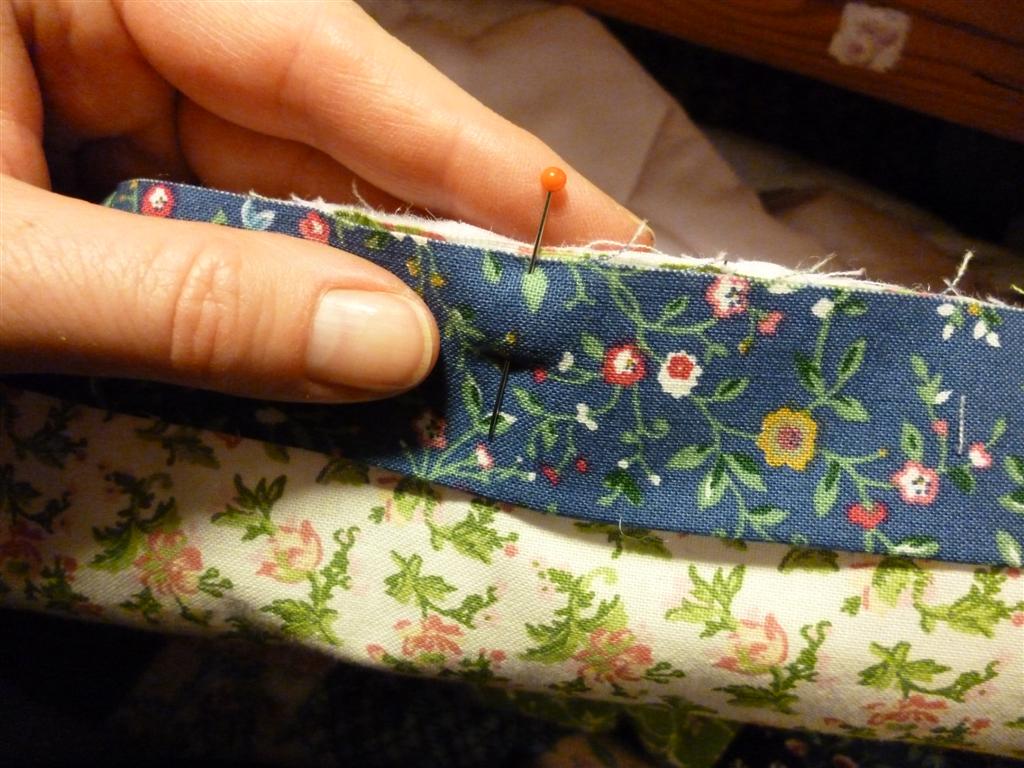
More squares and stitching.
Indeed, lots of stitching.
and hey presto...
A matching single bed, size quilt was made.
SNUGGLE-UMPTIOUS!
But our tale has a sad ending, sniff, sniff.
One little cushion was left behind and all alone in the world. (Oh NO!)
So in true 'Bagpuss' tradition Fi gathered it up and took it to her shop.
Just in case someone should come along one day and be in need of pretty patchwork cushion.

The End
x

Wednesday, 8 February 2012

Vintage hexy cushion No3.

Hello lovely ladies. Are you all hexed out yet?

or

can you manage another session of floral 6 sidedness?

and we're talking a lot of hexagons here, in fact were talking more hexagons than I had envisaged due to a mistake made with my cushion pad order!
Yep! I counted 92 little seams stitched, with a bit of lace thrown in for good measure.

It came as a bit of a shock when after stitching all my hexagons together I ripped open the parcel containing my new cushions to find a whopping great big 20"x24" cushion where there should have been a much smaller one.

Well you know what they say, 'If you've got lemons, make lemonade', so I got the fabric and scissors back out and added even more hexagons to make my cushion front large enough. Here it is ready to have a nice cotton backing attached to cover up all those patched raw edges. I can't bare having an untidy backside...if you get my meaning.

All that is left is my ta-daa moment so are you ready...

Ta-daa!

As is often the case, I rather like the backside too!


love fi x


Monday, 6 February 2012

Machine Hexed. part 3

Good morning you lovely lot. (Thank you for the Garden Wall appreciation.)

My journey with machine sewing hexagons has continued on a little. At the suggestion of a lovely new friend I've been stitching these together by only using seam allowance as a guide rather than marking with pen lines.
Still fiddly and very time consuming (but nowhere near as time consuming as hand piecing!) and there is a certain amount of guess work when it comes to starting a finishing each little seam but on the whole it's working.

Even though these hexes are quite large, you need more than you think to make a piece of fabric large enough for the front of a cushion cover!
Needless to say the back isn't hexed!
But never the less a rather gorgeous vintage looking squishy cushion.


There's been a little bag making too since I last posted. Inspired by the recent issue of Molly Makes. I made mine differently and to my own pattern though.

Not my usual style of bag but more a messenger shape. I'm particularly loving the old brown leather button that secures the lined front pocket.

Made from seriously scrummy Sanderson fabric and lined with some soft, blue spottiness, a skirt in a previous life. (waste not, want not)

I knotted the extra long strap at one side so that the length can be altered for 'across the body' or 'on the shoulder' wear. Hmmm... I'm not altogether sure about this bag, I think I will have to revisit this style of bag and have another play around with it some time. I feel the need for a little 'tweaking'.

And on the sewing machine today...

More hexagons.

Fiddly? Yes.

But obviously not fiddly enough as I've decided to add some lace too!

When will I learn!!!

Oh well...my mother always said I enjoyed a challenge!


love fi x


Saturday, 21 January 2012

1930's style patchwork cushion.

Ooo...you are a lovely bunch, thank you for all the Granny Pilley quilt love and Sally...get your great granny's quilt top out and make it into a quilt anyway you can! I'm sure if your great granny had a sewing machine at the time she would have used it. You need to give it life so that it can be loved and used as it was meant to be. Go on you can do it, we're all behind you.
After my first little experiment with joining hexagons by machine I thought I'd have another go, so I used some lovely 1930's style fabrics that I had left over from a previous project.

As you can probably tell by the photos, it's a little bit fiddly, but still certainly quicker than piecing by hand.

This the front before I pressed it.

There we go, pressed and a border attached basically so I could see the hexys framed. I only had a few squares of the 30's fabric, that's why it's only a small patch of hexys.

Not sure what to do next or even what I was making, I cut little 1 x 2 inch rectangles from the scraps of fabric left from each one of the squares that I'd cut the hexys from. (I hate to waste anything, lol.) And then I stitched them together and attached them around the edge. Once I done this my piece was almost large enough to make the front of a cushion cover, so another little trip to my fabric cupboard and another round of edging and I was ready to quilt my piece.

I chose to quilt the patchwork as I don't like to have all the raw edges of the patches inside my cushion cover, I like to have a backing on it so that all those raw edges are hidden away. So as I was putting a backing fabric on I thought I might as well put a piece of wadding in between. I laid my patchwork on a slightly larger piece of wadding and then laid these both on a larger piece of muslin. It's done this way because your work will shrink up slightly as you quilt it and you don't want to find that you're loosing your backing behind the edges of your front!


Once I'd finished quilting the front I trimmed off the excess muslin and wadding and stitched on a simple envelope back, and Bobs your uncle!

A 1930's style patchwork cushion, lovely in the kitchen or perfectly perfect for a little persons playroom, very soft and snuggly.


Next time we really must catch up with some felting before I forget about it completely!


love fi x


Wednesday, 18 January 2012

Granny Pilley's patchwork finished at last!

Do you remember many moons ago I found a box of treasure in my local charity shop? The unassuming brown cardboard box had the words 'Granny Pilley's embroidery' written on the side. Words that made my eyes twinkle and my heart race. I could hardly hand over my pennies quick enough to secure the box as my own.


And do you remember this higgledy-piggledy chunk of patchwork hexagons that I found inside that unassuming cardboard box? See... I told you it was a treasure box.
You may even remember that I unpicked and restitched the hexagons adding a border made from fabric I'd also found in a charity shop and a backing made from my Mums old sheet that I dyed pink.Well I have to say if you can remember all that you must have a memory like an elephant! I've just had to check back and I originally showed you 'Granny Pilleys' embroidery box way back in this post in October 2009! How embarrassing that it has taken me sooo long to get it finished. Yes you heard me right I've finally finished the quilt, HOORAY! I did have difficulty quilting it though. I started off quilting by hand and ended up quilting it on the machine and even then I got bored with that too! lol.

I've spent the last few days stitching together strips of fabric for the binding.

Look! How neat is that join? A pleasure to behold for sure!

I pressed it all in half along its entire length, this is the only kind of ironing I do, teehee.

I then pinned the binding to the edge of the quilt.

And stitched it in place moving the needle position on my sewing machine to the right so that I could run the fabric up the edge of the presser foot giving me a 1/4 inch seam. If you can't change the needle position on your machine you can buy a 1/4 inch foot or as you can see in the picture (the grubby beigey patch), stick a strip of masking tape on the foot plate 1/4 inch away from your needle and then use that to guide your fabric against.

I carefully stitched along each edge stopping one 1/4 inch from the end to make a neat corner. (I'll give a link at the end to a fab tutorial for binding quilts) Finally I stopped leaving a gap of about 10 inches and here comes the really clever part.

You trim your strip so that it overlaps exactly the same amount as the width you cut the edging in the beginning. So my edging was 2 and a 1/2 inches wide, so I overlap the ends by 2 and a 1/2 inches.

Then you overlap the two ends like we did when we joined the strips together and stitch at a 45 degree angle. Don't worry the tutorial makes this far simpler than I'm making it look.

Voila!

Isn't that just perfectly perfect! It's at this point you can dance a little jig if you wish.

Now comes my most favourite part of all! OH how I love doing this bit!

We flip the edging over and...

hand stitch the binding in place allll the waaaay around. Yummy! Don't forget to neaten your corners and stitch them in place too.

Ta daa!

My totally thrifted quilt!

Well where ever Granny Pilley is now I hope she's pleased with what I've done.
She can rest safe in the knowledge that it will have a very happy and useful life here in the MarmaladeRose household and is already loved very much. As promised here is the tutorial I use to bind my quilts, beautifully written by a very talented lady who's blog is called 'Don't look now'.

Till next time

love fi x